Tuesday, October 16, 2012

Home made, cheap grout cleaner

I've been needing to scrub my grout lines for quite some time,and I finally got around to doing it. I'm so glad I did! Clean grout lines on the kitchen floor just makes it seem cleaner, even if the baby did just dump an entire box of cereal on it. :) Here's the recipe for awesome grout cleaner
7 cups water
1/2 cup baking soda
1/3 cup ammonia
1/4 cup white vinegar

Simply mix, spray on, and scrub!


Friday, July 27, 2012

Cleaning microfiber furniture

Did you know that water  stains microfiber? I sure didn't. Until I kept seeing all these nasty spots show up on my couch every time there was a drip from a bottle or sippy cup. No matter how much I tried to dry it up, it always left a spot,and after awhile, those spots became overwhelming. I tried upholstery sprays that "should have" worked, but nothing quite cut it.....until, one day, while browsing Pinterest, I came across this wonderful method of cleaning my couch that really works! The magic ingredient....rubbing alcohol! (yup, the cheap stuff from the drugstore)

Here's how it works~ 

fill an empty spray bottle with the rubbing alcohol. Spray the area you intend to clean thoroughly.(I did one cushion at a time) Then, use the rough side of a Scotch Brite  sponge or an old hand towel, and scrub your heart out ;-) the alcohol evaporates quickly, so you may have to spray more to really get it clean. After you're satisfied, let it dry completely. Then, take a scrub brush (I got mine from the Dollar Tree) and work it in a circular motion to fluff the fabric up again. Your couch will look almost as good as new! 


Saturday, June 23, 2012

A quick DIY project

When we first got married, I had everything in the house decorated in "outdoor" themes. It was like that for a few years, and I decided that I didn't want that everywhere in our house anymore.  before, this clock  went well with what we had, but I've been trying to give our house decor a facelift on the cheap. So, I thought I'd see what I could do with this it :-)

I personally think it looks great black. So much more sleek. I think the thing I like most about it's new look though, is that I can change the picture anytime I want. I was even considering putting a pretty scripture verse about time. We'll see...for now, I get to look at that precious baby :-)
                               
Sorry about the picture quality....these were taken with my cell phone

Thursday, June 14, 2012

Cherries!


A friend of mine offered us some cherries, and we jumped at the opportunity. Who doesn't like free fruit? Funny...we were just praying the day before that the Lord would give us some free or cheap fruit this summer, so I could get lots of canning done this year with little cost into it. Coincidence? I think not ;-)

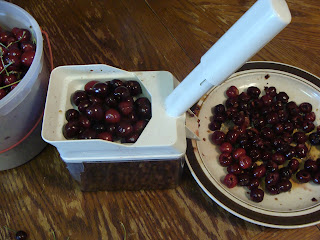
Anyway, we got a decent sized box full, and I decided I'd make cherry pie filling with half,  (Joseph was begging for pie filling) and dry the rest in my  dehydrator. I'll show you later what I ended up doing with the dried cherries....but right now, I'm going to focus on the pie filling. It is so good! 


 I had an the cutest little helper! To my surprise, she really was helping. Not just eating :-) She was grabbing as many cherries as her tiny hands could hold, and setting them in the stoner for me!

My friend lent me her awesome cherry stoner. I found it online,and can't wait to have my own!     


                                                                    Canned Cherry pie filling

                                     Note: I would suggest using Clear Jel for the thickener, rather that cornstarch. Notice that the finished product looks "cloudy" because I used cornstarch.  I personally just don't have access to Clear Jel except online, and  didn't have time to wait for that. 


 This recipe made just a little over 4 quart jars for me


*6 2/3 cups fresh  cherries
*2 cups granulated sugar
*1/2 cup + 2 tablespoon cornstarch or clear Jel
*2 2/3 cups cold water
*2 tablespoon + 2teaspoon bottled lemon juice
*1/4 teaspoon cinnamon
*1/2 teaspoon almond extract
*12 drops red food coloring 

Directions:

Rinse and pit fresh cherries, and hold in cold water. For fresh fruit, blanch cherries in one gallon of boiling water.(blanching sort of locks in that fresh fruit texture) After water returns to a boil, boil for one minute. Drain, but keep heated in a covered bowl or pot. Combine cornstarch and sugar in a large pot and add water. Add cinnamon, almond extract and food coloring. Stir mixture and cook over medium high heat until mixture thickens and bubbles. Add lemon juice and boil one minute, stirring constantly. Fold in drained cherries immediately. Fill your jars with mixture without delay, leaving one inch headspace. Adjust lids and process immediately in water bath canner for 35 minutes.


Tuesday, June 5, 2012

First post.....fun in the kitchen

Yesterday, we had our first rainy day in a long time.(It's been around 100) So, the girls have been outside alot lately. They were pretty grouchy and did not want to be inside, and I was feeling pretty brave, so I decided we were going to "cook" with food from the pantry, using real dishes and utensils. Well, all real food ingredients except for the play dough we made the other day. I just used what I had on hand. Unfortunately, I forgot the washed, and dried eggshells. Too bad...they would have loved that.
                                                              Joanna made doughnuts
                                                                         and cupcakes
  and cookies
                 While Naomi stirred, and sampled all the food options, until she found the good ones :-)


   And by the time they were done, I was very glad I put a sheet down first! Made for an easier clean up. Can you believe they did this for almost 2 hours?!?! Nothing ever has their attention more than 30 minutes!